It's may and the pool-season has started! So we'll have a look on how we find the best time to jump into water using an ESP8266, MQTT and NodeRED...
General idea
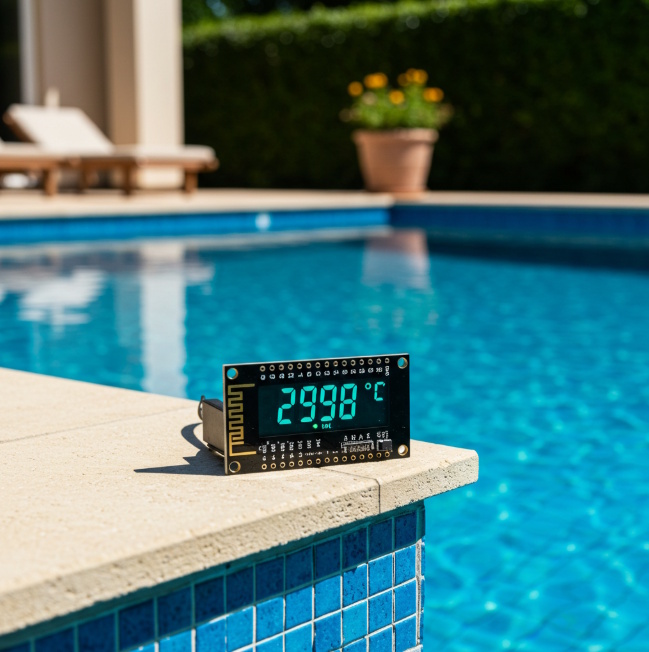
As I'm living in the center of Germany in the middle/northern of Europe, the temperatures at night can fall below 10°C - even during the summertime. This means, the temperature of the pool-water cools down several degrees of Celsius until the sun is strong enought to heat it up again at around 9 o'clock the next morning. So my idea was to use a small microcontroller to measure the water-temperature and send me a message when the water-temperature is above 24°C. As a temperature-sensor I love the cheap DS18B12 sensors using the one-wire-Interface in combination with one of the Espressif microcontrollers using the Arduino-Framework.
ESP8266
The idea is to use an ESP8266 staying in deep-sleep that wakes up every hour, connect to the WiFi, measure the temperature, send the data via MQTT and go back to deep-sleep. As we do not need any code within the main-loop, we have only a very short initialization function that will be called every hour. Within this code, we initialize all components and connections and send data via MQTT using the PubSubClient-library:
void setup() {
  // init temperature-sensor using Dallas DS18B20 library
  tempSensors.begin();

  // connect to local WiFi
  wifiInit();

  // connect to MQTT-server
  mqttInit();

  // send data to MQTT-broker
  mqttFetchAndTransmit();

  // wait another second
  delay(1000);

  // go into deepsleep
  // make sure that D0 is connected to RST via external connection
  ESP.deepSleep(3600e6); // in Microseconds: 1e6 = 1 second
}
Using the deep-sleep the ESP8266 consumes between 20 and 300 microampere. Using a single LiIon 18650-cell with 4000mAh and a voltage of 3.6V this pool-temperature-device should last at least one full pool-season. Even when using old cells, it should last for a couple of weeks.
So lets have a look into the individual functions: after initializing the Dallas-Sensor, we have to initialize the WiFi and connect to the MQTT-broker...
void wifiInit() {
  // configure as WiFi-client
  WiFi.mode(WIFI_STA);

  // use static IP
  WiFi.config(local_IP, gateway, subnet, primaryDNS, secondaryDNS);

  // start the WiFi
  WiFi.begin(ssid, password);

  // wait for connection
  while (WiFi.status() != WL_CONNECTED) {
      delay(500);
  }
}
This function waits until the WiFi-connection has been established successful. Afterwards we can connect to the MQTT-broker:
void mqttInit() {
  // configure MQTT-client
  mqttclient.setServer(mqtt_server, mqtt_serverport);

  // wait for connection
  while (!mqttclient.connected()) {
    mqttclient.connect(mqtt_id);
    delay(500);
  }
}
These functions are using several variables, definitions and objects that are defined in the header-part of the arduino-sketch:
// includes
#include
#include
#include
#include

// variables for WiFi
const char* ssid = "MyWiFiSSID";
const char* password = "MyStrongWiFiPassword";
IPAddress local_IP(192, 168, 0, 42);
IPAddress gateway(192, 168, 0, 1);
IPAddress subnet(255, 255, 255, 0);
IPAddress primaryDNS(192, 168, 0, 1);
IPAddress secondaryDNS(1, 1, 1, 1);

// defines for MQTT
#define mqtt_id "pool"
#define mqtt_server "192.168.0.41"
#define mqtt_serverport 1883

// objects for temperature-sensor
OneWire oneWire(D2); // oneWire on pin D2
DallasTemperature tempSensors(&oneWire);

// objects for WiFi and MQTT
WiFiClient myWifiClient;
PubSubClient mqttclient(myWifiClient);
MQTT and sending messages
With these few lines of code we connected to the WiFi and the MQTT-broker. Here I'm using Mosquitto on a regular Debian-system. Now we can think about the data we can transmit. The most important thing will be - of course - the actual temperature of the pool, but the voltage would be nice to get an idea of the state-of-charge (SOC) of the LiIon-battery. So first we have to request the data from the dallas-sensors and publish it to the MQTT-broker. Afterwards we read the battery-voltage and publish it to the broker as well:
void mqttFetchAndTransmit() {
  // first we have to read the temperature
  // we read the sensors using blocking mode
  // so we are waiting for new value on next line
  tempSensors.requestTemperaturesByIndex(0);
  mqttclient.publish("pool/temperature", String(tempSensors.getTempCByIndex(0)).c_str());

  // now we read the voltage of the battery using the analog input
  // a small voltage-divider is connected here to reduce the up to 4.2V down to a maximum of 3.3V
  float batteryVoltage = ((analogRead(A0)*3.3f)/1023.0f) * 3.2f;
  mqttclient.publish("pool/battery", String(batteryVoltage, 6).c_str());

  // give MQTT-client a bit time to transfer data
  mqttclient.loop();
  mqttclient.flush();
}
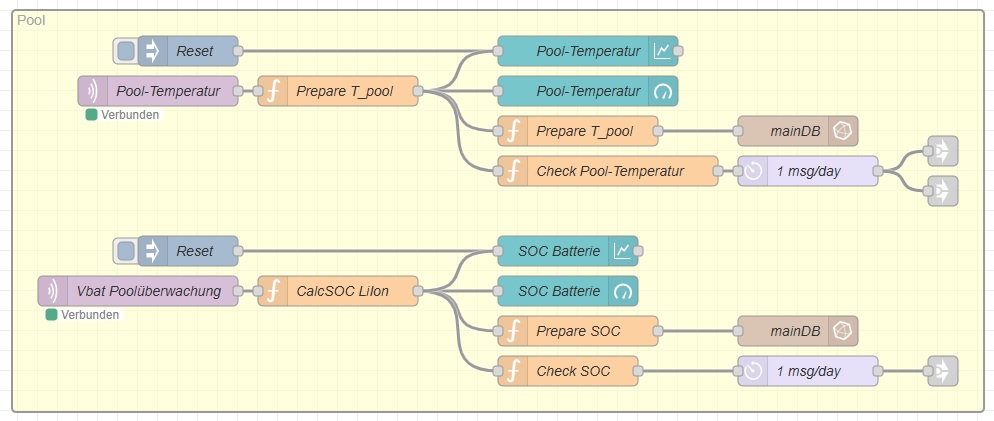
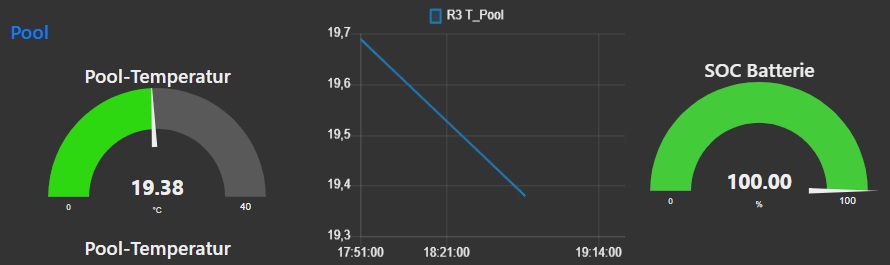
Of course, the MQTT-broker cannot do anything with these data as it only distributes the information. So the two MQTT-topics are subscribed by my NodeRED, that will do the rest of the processing. Here the temperature is fed into a comparison-block: if the temperature is above a specific threshold, a message is sent to the potential swimmers. I used a rate-limiter to prevent spamming our mobile-phones if the temperature is oscillating around this threshold within the day. So the main-task of our new device is already working now:
State of charge
To be sure not to miss a promising swimming-day we should make sure that the battery-SOC of the device is fine. If this SOC is below a specific value, we should get a warning. As NodeRED is already aware of the battery-voltage, we can keep track of the SOC. For lithium-batteries the idle-voltage has a direct correlation to the state-of-charge using the following table/graph:
| Voltage | SOC |
|---|---|
| 4.20 V | Final charging voltage |
| 3.65 V | 100% |
| 3.40 V | 100% (Begin of discharging) |
| 3.35 V | 90% |
| 3.32 V | 80% |
| 3.30 V | 70% |
| 3.27 V | 60% |
| 3.26 V | 50% |
| 3.25 V | 40% |
| 3.22 V | 30% |
| 3.20 V | 20% |
| 3.00 V | 10% |
| 2.50 V | 0% |

To have a more precise SOC-tracking we could implement a kind of coulomb-counting. Here we could keep track of the used current over time, but we are not aware of the drawn current over a specific time-span in detail. So for our device it is fine to send a warning to the users once our battery-voltage is below 25% which means a voltage below 3,1V.
Outlook
This device is a very nice basis for more complex DIY-IoT-devices. As thousands of WiFi-capable lamps are based on these ESP8266, its not the worst idea to play around with this kind of devices. Based on this, I created a WiFi-/NodeRED-capable controller for our sun-shutter even Velux does not support DIY-devices very well. But that's a story for another blog-entry.
Comments